0 comments

Meat

I haven't posted lately, mostly because the whole garden thing frankly overwhelmed me (so many weeds! All the time!), and I had a baby.

Then we had canning and fruit fly fiascos, and I just felt as though the whole self-sufficiency thing maybe wasn't for me... however, I have been buoyed up with a reading of Barbara Kingsolver's "Animal, Vegetable, Miracle" and am taking a new stance of, well, if I can't (or won't) create it myself, I might as well do the environmentally correct thing-- buy locally and as naturally as possible.

This has led me to do great amounts of research, resulting in such exciting finds as beefalo and... the Springville Meat Company.

Today I made Simon accompany me to this rather plain facaded and almost creepy building (I'm pretty sure I thought it was an abandoned building up to this point). I ventured in because I learned that Morgan Valley Lamb processes and sells their meat here.

Long story short, I bought some local lamb (which is scary in itself)... AND a cowboy (who was interested in the Meat Company killing and processing a buffalo) tipped his hat at me as I was leaving.

Which left me wondering... where do I live?!?! Cowboys, buffalo, meat packing?! Phew. What a day.

read more
0 comments

Yard Work

Today/tonight we will attempt to do yard work.

The thing about yard work is it is never-ending. You think you have the upper hand and everything looks great, but then you turn your back for a week (or month) and suddenly the bushes are crazy and not well manicured, the grass has gone to seed, morning glory weeds are taking over the flower beds, long grasses are sprouting on all the edges of the lawn and garden (due to no edger), and the garden has tiny weed sprouts (that appeared seemingly overnight) infesting the onion patch.

Okay, so maybe this is just the state of our current yard. I do have an excuse: being in the last of the last trimester of pregnancy. However, I still feel shame at being the corner house on a busy street and having the yard be in such a state. Especially now that there is a carnival up the street for the next few days and people are parking on our weeds and near our sad yard.

Because I am so pregnant, doing much of this yard work will be difficult if not impossible, even if only because my feet and legs will swell up to twice their size (seriously). I will try my darnedest to get a lot done during the day (with many breaks), but I am hoping that Jamund will put in a good 3 hours tonight....

...which leads me to the real purpose of this post: how do we get men to do yard work? For me, I do yard work out of duty and pride, especially being on a corner of a main street. Men don't seem to have the same sense of duty (at least not Jamund). My solution to get him to work outside: new tools.

When men have new tools to use for just about anything, they tend to do the project: new mop, new computer, new toothbrush, etc. Hey, it even worked for our household with the purchase of a refurbished Dyson! Have I vacuumed in the last month or two? Nope!

My secret hope is that the $25 edger we purchased last night at Lowe's will get Jamund to do his fair share in the yard tonight. We will see! We also purchased a cheap nozzle for the hose so that it will shower/mist/spray/etc. the garden better: yesterday the garden got watered 3 times (usually it's just twice, but the new nozzle inspired the third water).

New tools. That's the key.

read more
1 comments

Wheat Bread

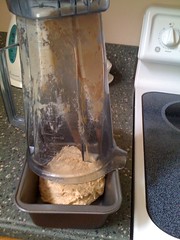
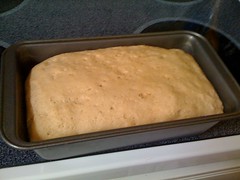
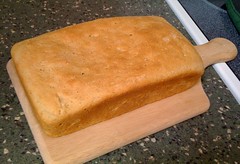
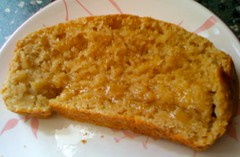
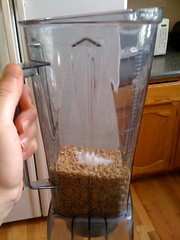
Today I decided to make wheat bread from scratch. We just got a case of wheat, and I was anxious to make some delicious homemade bread. I've never ground wheat kernels all by my lonesome, but I was confident in doing so thanks to our lovely... VITA MIX! Seriously, so easy. The whole process (from raw wheat kernels to me eating a piece of bread with honey and butter) took roughly an hour and twenty minutes. Miraculous? Yes. The recipe came from one of the Vita Mix grain cookbooks.

Here are some photos:

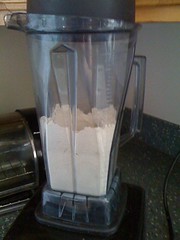
Wheat. With some salt.

IMG_0097_2

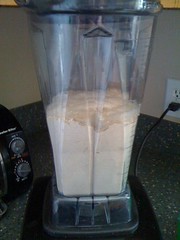
Viola! Wheat flour (after about one minute in the Vita Mix! Easiest way to grind wheat into flour!):

IMG_0098_2

Mixing all ingredients together (in the Vita Mix). You even "knead" the bread in the container:

IMG_0100

Plopping the dough into the bread pan:

IMG_0101_2

The dough after rising for about 20 minutes:

IMG_0103

The finished bread:

IMG_0106 IMG_0107
read more
1 comments

Project: Kitchen

This afternoon I attempted to clean the kitchen using natural ingredients rather than store bought sprays and chemicals.

My three main weapons of clean:
1. Vinegar (regular white)
2. Lemon juice
3. Baking soda

Because I didn't have an extra, empty spray bottle, I used a water bottle and made a mixture of vinegar and lemon juice (didn't measure, just eye-balled it). I then used this mixture to clean all the counters, table, and refrigerator. Using a sponge, I either poured a little of the mixture directly onto the surface to be cleaned or poured some on the sponge. It actually worked well! The lemon juice cut the powerful stench of vinegar, so it wasn't too nauseating a product with which to work. However, cleaning the microwave and getting my face all up in the tiny space was a little much.

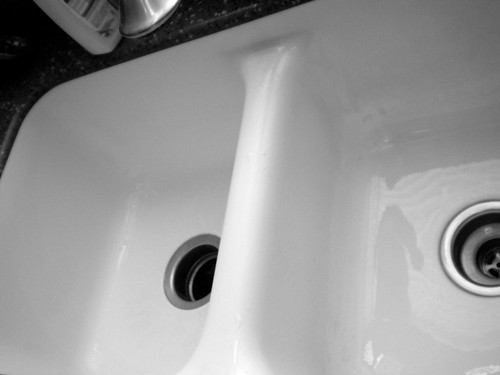
The big test, however, came with the kitchen sink. Our sink gets these marks on it from cleaning pots and pans, and I was skeptical that anything other than the professional powders could get the marks off:

DSCN0707

However, I sprinkled my trusty baking soda around the inside of the sink (I have read and heard from many sources that baking soda is a power cleaner), wet my sponge, and began to scour! The miracle: it actually worked! It required a bit more elbow grease to remove the marks than I have to apply when using the professional powders, but it was definitely worth it to know that I used a "natural" product. I didn't even feel like I had to immediately wash my hands before starting to prepare dinner!

Here is the sink after:

DSCN0708
read more
0 comments

Seedlings

Trying to successfully plant a garden in Utah is tantamount to trying to make money gambling on a horse race.

Utah tantalizes you in early to mid April with sunny days and otherwise lovely weather, tricking you into thinking, "Oh, surely planting my garden now is safe. It is April, after all, and the weather has been fine consistently for about a week."

So then you go to Home Depot and spend over $100 on flowers, plant them in your front yard, and revel in the beauty. You even turn on the sprinklers.

But then, Utah wins. It decides to snow again....and again...and again. At first it's just a light dusting a night, but then it decides to snow during the day as well, and your newly planted flowers are living in an ice bath.

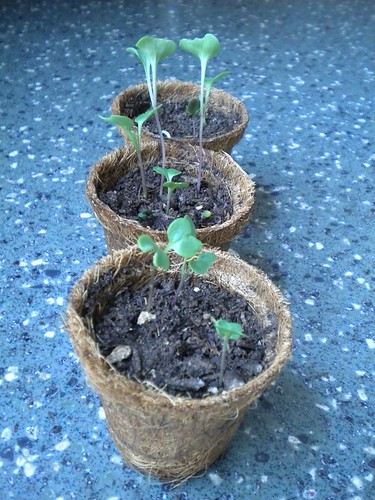
Needless to say, we were fooled with the flowers. However, they are still alive (mostly), and I am happy to admit that I was NOT fooled with the fruits and vegetables. These I have started planting indoors, and they are still (mostly) thriving or waiting to thrive on our kitchen counter:

DSCN0704

So far, I have planted broccoli, cherry tomatoes, cantaloupe, honeydew, and watermelon from seeds. In about a week, we will attempt to plant them in the garden (aren't the blossoming pear trees lovely?):

DSCN0645

Expect many more posts on the gardening process, which is really the ultimate test at self-sufficiency. One can't really be truly self-sufficient if she can't grow at least some of her own food, right? (Also expect posts on canning pears and making pear baby food!)
read more
0 comments

Project: Compost

Even before we decided to have a baby, we found an advertisement/snippet about gdiapers in ReadyMade magazine. Imagine our joy: eco friendly diapers that require less work than cloth diapers!? Sign me up! We will let you do your own research on the marvels of these diapers, but, for us, one of the best parts is that they are compostable.

To fully and personally take advantage of this benefit, however, means that one must have a compost bin. After moving into our new house, we decided where to best place the compost bin so as to avoid stench complaints from the neighbors. What better place than on the main road, away from other houses, where teenagers are walking to high school each day!? (Okay, there probably could've been better places, but in cleaning that part of the garden, we found a lot of trash that these ruffians probably threw over the fence anyway, so why not give them a proper receptacle for their trashy behavior?)

After choosing this location, digging up a giant grape vine stump that had lived there for far too long, and waiting for the snow to melt, we were finally ready to build our bin.

My husband, Jamund, did his research about compost bins, using various online sources and the following books: the Reader's Digest 1001 Hints and Tips for Your Garden (awesome book) and The Self-Sufficient-ish Bible (equally awesome book).

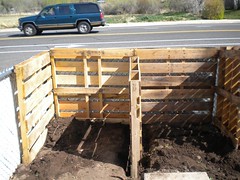
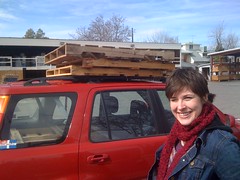
We then made some calls to find wooden pallets for sale (we found some at our local Sunroc for about $1.50 each):

IMG_0205

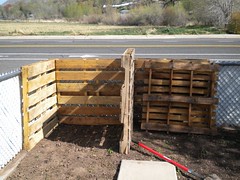
Jamund then dug little trenches in the garden where he wanted to place the pallets so they would all be roughly the same height (although the middle pallet separating the two sides of the compost bin is slightly lower to make it easier to transfer old compost from one side to the other).
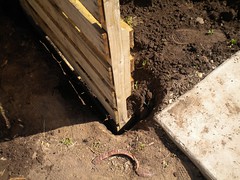
DSCN0639

This is before digging the trench (note how high the middle pallet is):
DSCN0638

After digging the trench:

DSCN0640

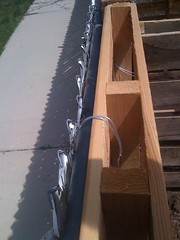
The next step, once all the pallets were in place, was to secure them to each other. We had read about many different options for doing so, but we decided upon using some wire that we bought at Home Depot and simply wrapped it around the pallets at crucial locations like:

1. Corners
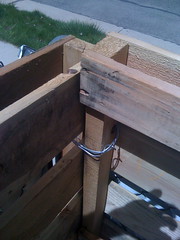
IMG_0225

2. Joints (where the two sides of the bin meet):
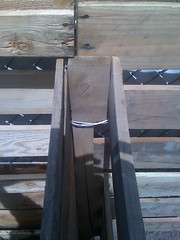
IMG_0227

3. And to the fence itself:
IMG_0228

We ended up with a sturdy and rather large compost bin. We now just have to fill it up with appropriate items (meaning things that are compostable and will not invite rats and the like) and get it going with some manure.

We are so excited to have the compost bin and designated an old waste basket as our "compost" basket. It lives right outside the kitchen door in the garage, and we put all scraps of fruit, bread, etc. in it. Then we just take that little "compost basket" out to the garden once it gets pretty full (or smelly) and dump it into the compost bin. It is so exciting to not throw out these "natural" things (and even seemingly "unnatural" things like paper towels or napkins)! Jamund is also dumping the grass clippings from mowing the lawn into the compost bin. Better there than the landfill!

Once we have a good amount of compost, we plan to add "railings" to the front of the bin so that the compost doesn't just spill out of the bin. We are going to use some old wood that was left at the house for this purpose. We'll keep you updated!
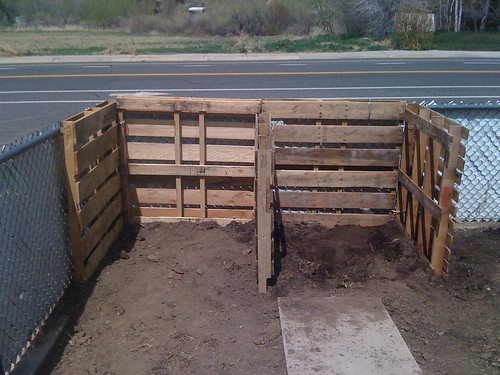
IMG_0232
read more
0 comments

The Beginning

I never classified myself as being "eco." I didn't grow up being anal about recycling. I didn't concern myself with eating fresh, natural ingredients. My parents didn't teach me to live in that way. My dad once mused, tongue in cheek, that when he takes out the recycling he "sings the National Anthem." In other words, our family comfort foods were not hummus and pita but chocolate and breakfast pastries.

However, with growing up came moving on to different and new life choices. Roommates came and went, two of whom were vegetarian and vegan, respectively. I dabbled in both dietary options but found myself craving meat too much to properly embrace either lifestyle. Sorry friends!

Marriage brought with it a spouse who majored in Community and Environmental Planning at the University of Washington. He is an ex-vegetarian, has his LEED Green Associate, and loves everything eco-friendly. Ironically, while not a fan of the outdoors, he is a fan of sustainable living.

The idea of self-sufficiency arose, oddly enough, through knitting—perhaps not directly, but in the round about way that these sorts of things normally arise. Because I knit (and love "cute" things and animals), I took an interest in sheep. This interest in sheep led to an interest in perhaps having our own farm someday. This interest in farming led to my checking out a book from our local library entitled "The Self-Sufficient Life and How to Live It" by John Seymour.

Now, almost a year later, we have our own home and, although it is not a farm, it did come with a small garden and large enough backyard. Coincidentally or not, I am also now without full time employment while preparing to have our first baby, leaving me with not only time but also the ability to make our family more sustainable.

With all these factors on my side, I have decided to begin my personal quest to follow some of the tips in John Seymour's classic (which has since become a permanent resident of our home library), as well as hints, recipes, and ideas from magazines and on-line sources to become more self-sufficient.

Feel free to comment and follow my family's step-by-step journey to become more reliant on ourselves and the things that nature has given us rather than taking the easy way out!
read more